
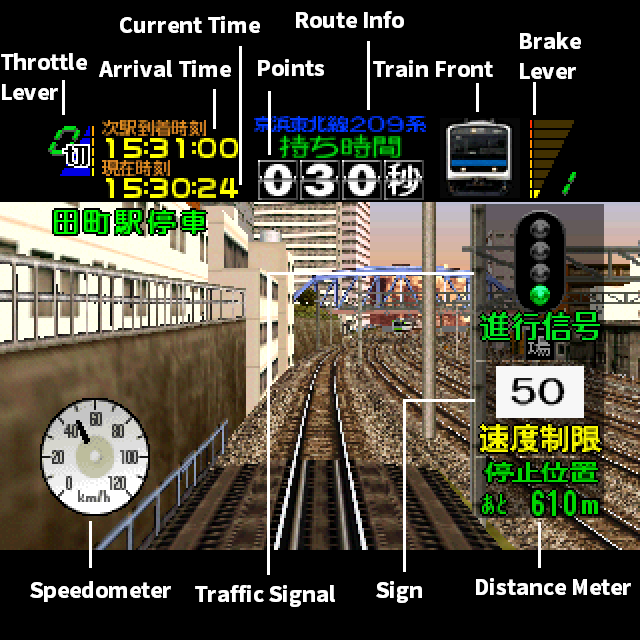
As you can see, there's a lot of stuff to talk about here.
The Basic UI Elements
At the top-left and top-right corners of the screen are the throttle level and brake lever respectively. The maximum amount of throttle is 5 while the maximum amount of braking is normally 8. While emergency brakes can be applied at any time it's not recommended unless it's an emergency, otherwise you'll lose points. You can't accelerate the train while the brakes are on, and enabling the brakes will reset the throttle lever.
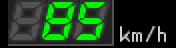
The speedometer is pretty straight forward, it displays your current speed. You can change from an analog to a digital one (pictured on the right) on the game's settings (or none at all).
The amount of points you have is displayed right on top of the screen, more details about the point system can be seen in this page.
The timer is displayed between the throttle lever and the points, on the bottom is the current time and on the top is the time that you have to arrive at the next station (if it's yellow) or the time that you have to pass by the next station (if it's white). Reaching an station late will subtract one point every second (or two on harder stages).
Lastly, the next station is displayed on the top left corner of the screen, right below the timer, along with the Japanese words for "stopping station"/"pass-through station". It's best to try and memorize the kanji for a few important stations, so you have an idea of where you are in the stage.
Before Leaving the Station...
You need to wait until not only the light is green (see the Traffic Signals section below), but also wait for the train doors to close. There's a small indicator that will appear on the left corner of the screen when you're about to leave a station, wait until it lights up to start accelerating. Otherwise, you lose points.


Distance Meter
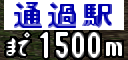

The distance meter is very obviously a very important piece of information. It will display the remaining distance to the next station in meters or centimeters depending on the game's settings. The meter will be blue/white when the next station is pass-through and will be green when you have to stop there.
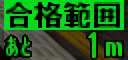
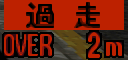
When stopping at a station, the text at the top of the meter will change to black with a green background for emphasis, that means you're in the area where the train can stop at. Going over 0m will make the meter start counting the distance you went over the station. Stopping earlier than the designated area means you'll have to re-accelerate the train, while stopping later will turn the meter red and will deduct, in points, the amount of meters you went past the station (or double the amount in harder stages).
Note: You can toggle it on or off if you're feeling courageous.
Traffic Signals - "Shingō"
Traffic signals are important as they severely and abruptly restrict your speed on the tracks. Breaking the speed limit imposed by one of these will result in ATS kicking in and forcing an emergency stop. Most of the time they are caused by arriving at or passing by a station too early, however a few of them appear at pre-determined spots on a stage, even if you're on time.
The amount of points you lose by passing one of these speed limits is equivalent to how much you passed the limit by (82 km/h at a 70 km/h limit means 12 points). Easier stages have maximum limits to the amount of points you can lose, more difficult stages do not. The traffic signals are as follows:
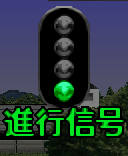
Proceed Signal - "Shinkō"
Typically, this is the one you'll see the most and really the only one you'd want to see in an ideal playthrough. It's a signal with single green light lit up that simply means proceed forwards.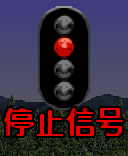
Stop Signal - "Teishi"
This is a stop signal, indicated by one red light. You'll have to stop the train before you pass by it. Arriving at a station way too early, or arriving early at a station after a previous traffic signal limit will make this signal have a reasonable chance of appearing.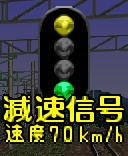
Reduced Speed Signal - "Gensoku"
Ah...this one. It's a limit of 70 km/h, indicated by a green and a yellow light. This is the most common traffic signal to see when passing a station too early, often surprising the player and leaving next to no time to react and slow down the train before passing the signal which ends up costing precious points and time. It's best to try and anticipate this one before it appears.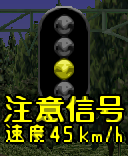
Caution Signal - "Chūi"
Less common yet more worrying, a yellow light signal meaning 45 km/h or less. If it appears after a gensoku signal you can half-expect a stop signal right after it. Usually not a difficult one to get by but it has a much bigger impact on time.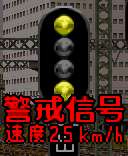
Restricted Speed Signal - "Keikai"
Somewhat uncommon, this signal with two yellow lights lit up restricts your speed to 25 km/h. This will usually be the first traffic signal to appear if you stop at a station way too early. In some situations it might be convenient to break this limit.
Emergency Stop Signal - "Kinkyū"
Quite a rare one, indicated by five red lights rotating in an hexagon shaped signal. This is more frequently known as an "Obstruction-warning" signal, and warns the player of an unusual situation on or near the tracks that require an immediate stop. Has a chance of appearing before a railroad crossing if you are more than 8 seconds early to a station. Immediatelly activate the emergency brakes and hope you can stop the train before it hits the vehicle up ahead. You'll either win or lose a lot of points depending if you are able to stop the train in time or not.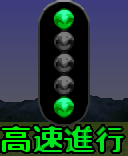
High Speed Signal - "Kōsoku Shinkō"
This signal only appears in one route used by the Hakutaka Express - 681 Series and has two green lights lit up. It informs the player of a section where it's recommended to go over 130 km/h.Relay Signals - "Chūkei"
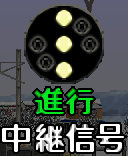
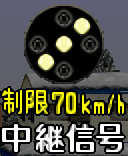
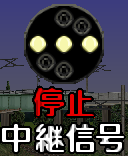
These will appear occasionally and slightly before the actual traffic signal, relaying its state. This is used in areas where the actual traffic signal might be obstructed or be difficult to see on certain occasions. They are useful in letting you know what's coming up ahead.
Note: A relay signal of a Caution Signal (45 km/h) will only have the yellow text in it with no speed indicator.
Signs
All signs display information about the upcoming or current track. They appear at set points in each route that can be memorized throughout multiple playthroughs.
Speed Limits - "Seigen"
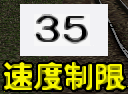
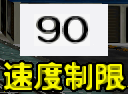
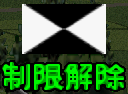
These are speed limit signs, they'll display the upcoming speed limit and start blinking, once they stop, the limit is in place and passing it will deduct points but will not stop the train. The limit is effective until a Limit Clear Sign is displayed with a shape somewhat reminiscent of an stretched hourglass.
Note: When the speed limit of the track rises (ex. from 80 km/h to 90 km/h) there is no prior warning, as such if you have passed the first limit and you're over the speed for the second limit, you'll lose points immediatelly.
Others


There's another X-shaped sign, this time yellow and less rectangular. When it appears you have to press the train horn or else you'll lose points.
There are also slope indicators, they'll point upwards if the current slope is uphill or downwards if it's downhill. It's a good idea to pay attention to these, as the steepness of the tracks will affect how the train accelerates/brakes. There's also an horizontal slope indicator that will appear when the slope ends.